
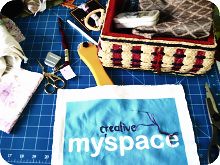
This morning, in addition to a picture of my creative space...where I am finishing up my summer banner using the awesome embroidery patterns of Wild Olive--I have a "as promised" tutorial on how I made my Glen Village doll. This is part one of the tutorial.

You will need white fabric, crayons (not the washable kind), and a pattern. I made this bear pattern to show you. Feel free to use it or you could use coloring book pages, etc.

Place white fabric on pattern and trace over it using your crayons and not your normal transfer pen etc. It should be fairly simple to see the pattern through the cloth, but, if not, use a lamp, light box, window, etc. Turn your paper pattern over, trace over the lines in black pen. Now trace with crayon this image to the white fabric next to your first image. Place it a few inches apart so you can cut out the two pieces later. This will give you a front and back piece.
Color in the patterns on your fabric. Be careful not to use too much crayon. Light and easy seems to work best.

Here is the crucial step: place the fabric in the dryer and dry on high for about 15 minutes. I tried using an iron to set the crayon but it didn't fully set it. Using my dryer I've gotten much better results. This will set the colour you have just added so the design does not smear.
In the next post I will tell you how I embroidered it and then turned it into a little doll.


2 comments:
I like the bright greens and blues under your machine. Makes the space feel that much more special.
Great tip about the heat setting.
Post a Comment